

Setting powder can make the difference between makeup that looks fresh for hours and makeup that starts sliding, creasing, or looking oily halfway through the day. But using too much or applying it in the wrong places can leave your skin looking dry, heavy, or cakey.
So, how to use setting powder The good news is that you don’t need a complicated technique. You mainly need the right powder, the right tool, and a light hand.

This guide explains how to apply setting powder, where to put it, how much to use, which application method works best for different skin types, and the mistakes that can ruin an otherwise good makeup look.
What Is Setting Powder?
Setting powder is a finely milled makeup product used to help set liquid or cream products such as foundation, concealer, and cream contour.
Its main job is to reduce excess moisture and shine on the skin while helping your base makeup stay in place. Depending on the formula, it can also slightly blur the appearance of pores and create a softer finish.
Setting powders generally come in two main forms:
- Loose powder: Usually very finely milled and popular for setting concealer and controlling shine.
- Pressed powder: Compact and convenient, making it useful for everyday makeup and touch-ups.
Some setting powders are translucent, while others contain pigment. A translucent powder is designed to set makeup without significantly changing its color, whereas a tinted powder can add a little coverage or help adjust the appearance of your complexion.
How to Use Setting Powder Step by Step
The easiest way to get a natural result is to apply setting powder after your liquid and cream makeup has been blended properly.
Finish Your Cream and Liquid Makeup First
Start with your usual makeup routine.
Apply your moisturizer, primer if you use one, foundation, concealer, and other cream or liquid products.
Blend everything well before reaching for the powder.
Setting powder should not be used to fix poorly blended foundation or concealer. If the base underneath is uneven, powder can actually make the texture more noticeable.
sed to fix poorly blended foundation or concealer. If the base underneath is uneven, powder can actually make the texture more noticeable.
Let Your Makeup Settle for a Moment
You don’t necessarily need to wait several minutes, but give your foundation and concealer a short moment to settle.

This is especially useful if you have applied a generous amount of concealer underneath your eyes. Before powdering, gently check for creases and blend them out with a clean finger, sponge, or brush.
Once you set a crease with powder, it becomes much harder to smooth out later.
Pick Up a Small Amount of Powder
This is where many people go wrong.
You don’t need a thick layer of powder to set your makeup.
For loose powder, lightly dip your brush or sponge into the product and remove the excess before applying it. If you’re using a powder puff, press it lightly into the powder rather than loading it with a large amount.
Think thin layer, not full coverage.
Apply Powder Where You Actually Need It
You don’t always need powder on your entire face.
Focus on areas where makeup tends to move, crease, or become shiny.
Common areas include:
- Under the eyes
- Around the nose
- Forehead
- Chin
- Center of the cheeks
- Any area that becomes oily during the day
If your cheeks are naturally dry, you may want to leave them mostly powder-free.
This targeted approach often gives a more natural finish than covering every inch of your face with powder.
Use Pressing Motions Instead of Rubbing
When you apply setting powder, gently press or tap it onto the skin.
Avoid aggressively sweeping the brush back and forth, especially over areas where you’ve applied concealer. Rubbing can disturb the makeup underneath.
For a brush application, use light tapping or soft buffing motions. With a puff or sponge, gently press the powder into the skin.
The goal is to set the makeup, not move it around.
Check the Finish in Natural Light
Once you’ve applied the powder, take a quick look at your face in natural light if possible.
Ask yourself:
- Does my skin still look like skin?
- Is there visible powder sitting on top?
- Are my under-eyes looking dry?
- Is there unwanted shine?
- Does my foundation still look evenly blended?
If everything looks balanced, stop there.
Adding more powder simply because you have some left on the brush can make the final result heavier.
How to Apply Setting Powder Under the Eyes
The under-eye area needs a slightly different approach because the skin there can show dryness and fine lines more easily.
After applying concealer, gently blend away any creases. Then pick up a small amount of finely milled setting powder.
Using a small fluffy brush or makeup puff, lightly press the powder over the concealer.
You don’t need to bake your under-eyes unless you specifically want that more heavily powdered makeup style.
For everyday makeup, a thin layer is usually easier to keep looking fresh.
A Simple Under-Eye Technique
Try this:
- Apply your concealer.
- Blend it thoroughly.
- Look upward or relax your face so you can see where creases form.
- Smooth out those creases.
- Pick up a tiny amount of powder.
- Press it gently over the area.
- Remove any obvious excess.
If your under-eyes look dry immediately after powdering, you’re probably using too much product or using a formula that doesn’t suit that area.
How to Use Setting Powder on Oily Skin
If you have oily skin, powder can be particularly useful around the areas where shine appears first.
That doesn’t mean you need to cover your whole face in a thick layer.
Instead, concentrate on your T-zone:
- Forehead
- Nose
- Area around the nose
- Chin
Apply a thin layer and add more only where necessary.
If your skin becomes shiny later, you can first remove excess oil with blotting paper or a tissue before adding another light layer of powder.
Simply piling powder on top of oil can create a thick, uneven texture.
How to Use Setting Powder on Dry Skin
Dry skin doesn’t mean you have to avoid setting powder completely.
The key is where and how much you apply.
Use powder mainly on areas where your makeup needs extra staying power. You may not need much powder on dry cheeks.
Before makeup, make sure your skincare routine gives your skin enough moisture. Then use a small amount of powder rather than heavily setting the entire face.
A finely milled powder can be more comfortable for this purpose, but the best choice still depends on how your skin reacts to the particular product.
Setting Powder vs. Finishing Powder: What’s the Difference?
The names can be confusing because different brands sometimes use the terms differently.
Generally, setting powder is used primarily to help set liquid and cream makeup and reduce excess moisture or shine.
Finishing powder is often used as a final complexion step to refine the appearance of the skin, soften the look of texture, or create a particular finish.
Some products can perform both roles, so always check the product’s instructions and intended use.
If your main goal is to keep foundation and concealer from moving, setting powder is the more relevant product.
Loose Powder vs. Pressed Powder
Both can work well, but they have different advantages.
| Feature | Loose Setting Powder | Pressed Powder |
| Texture | Usually very fine | Usually more compact |
| Best for | Setting makeup at home | Everyday use and touch-ups |
| Application | Brush, puff, or sponge | Brush or included applicator |
| Portability | Less convenient | Very convenient |
| Touch-ups | Can be messy | Easy to carry |
If you’re doing a full makeup look at home, loose powder can be convenient.
If you want something for your handbag or makeup bag, pressed powder is usually easier to handle.
What Tool Should You Use to Apply Setting Powder?
There’s no single “correct” tool. The best choice depends on the finish you’re after.
Powder Brush
A fluffy brush gives you a lighter, more diffused application.
It’s a good choice when you want a natural finish and don’t want a lot of powder on the skin.
Makeup Puff
A puff can press powder more firmly into the skin.
It’s particularly useful around oily areas or when you want more controlled coverage.
Makeup Sponge
A sponge can also be used to press powder into the skin. This technique is often associated with baking, although you don’t have to use a large amount of powder to get the benefits of pressing powder into the skin.
How to Put on Setting Powder Without Looking Cakey
If your makeup frequently looks heavy after powdering, the problem may not be the powder itself.
Try these adjustments:
Use Less Product
Start with a small amount. It’s much easier to add powder than to remove an excessive layer.
Don’t Powder Every Area Equally
Your nose may need powder while your cheeks don’t. Treat different areas of your face differently.
Blend Before Setting
Creased concealer should be smoothed out before powder goes on.
Avoid Repeated Layers
If you’re touching up throughout the day, remove excess oil first. Then apply a small amount of powder.
Choose the Right Finish
A very matte powder may not be the best match if you prefer a naturally luminous complexion.
Common Setting Powder Mistakes
Even a good powder can look bad when it’s applied incorrectly.
Applying Too Much
This is probably the most common mistake.
A thick layer can emphasize dryness and texture instead of creating a smooth finish.
Setting Creased Concealer
Powder won’t magically erase a crease.
If concealer has already settled into a line, smooth it out first and then set the area.
Using the Same Amount Everywhere
Your forehead and nose may need more powder than your cheeks.
Applying the same amount across the entire face can make the complexion look unnecessarily flat.
Rubbing the Powder In
Heavy brushing can disturb foundation and concealer.
Use gentle pressing or sweeping motions instead.
Adding Powder Over Excess Oil
If your face is very oily, blot first. Otherwise, you may end up with a thick mixture of oil and powder sitting on the skin.
Forgetting to Check the Final Finish
Makeup can look different under bathroom lighting, daylight, and flash photography.
If possible, check your face under more than one type of lighting.
Do You Need to Set Your Whole Face With Powder?
No.
Setting your entire face is optional.
If your foundation already looks comfortable and your skin isn’t particularly oily, you may only need powder under your eyes and around the center of your face.
This can help maintain some of the natural finish of your foundation while still giving you control over shine and movement.
How Much Setting Powder Should You Use?
There isn’t one exact amount that works for everyone.
A good starting point is a thin, barely visible layer.
Your skin should not look covered in obvious powder after application.
If you need more oil control, build the product gradually instead of applying a large amount at once.
Remember: setting powder is there to support your makeup, not become the most noticeable part of it.
Can You Apply Setting Powder After Blush and Bronzer?
Yes, but it depends on the products you’re using and the finish you want.
If you’re using powder blush and bronzer, it’s usually easiest to apply them after you’ve finished setting the base.
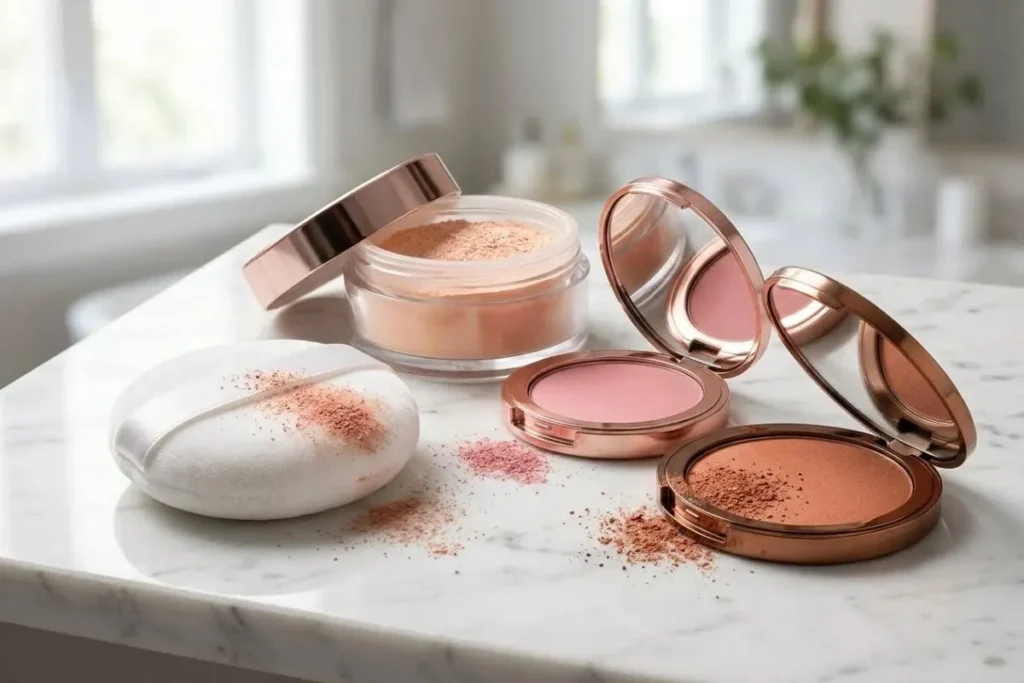
If you’re using cream blush or cream bronzer, the order can be different. In general, cream products are applied before powder products so the powder doesn’t interfere with their blending.
The important thing is to avoid putting a heavy layer of powder underneath a cream product if you want that cream product to blend smoothly.
How to Use Setting Powder for a Natural Makeup Look
For an everyday look, you don’t need a heavily powdered complexion.
Try this simple routine:
- Apply your foundation and concealer.
- Blend everything thoroughly.
- Smooth away any under-eye creases.
- Apply a small amount of setting powder under the eyes.
- Lightly powder your T-zone.
- Leave areas that don’t need powder alone.
- Finish with your blush, bronzer, or other powder products as needed.
The result should look polished without making your skin look overly matte or dry.
How to Touch Up With Setting Powder During the Day
If your makeup becomes shiny several hours after application, don’t immediately add a lot more powder.
First, gently remove excess oil with blotting paper or a tissue.
Then use a small amount of pressed or loose powder on the areas that need it.
Pay particular attention to the nose, forehead, and chin if those are your usual problem areas.
A small touch-up is usually more effective than repeatedly covering the entire face.
Frequently Asked Questions
When should I apply setting powder?
Apply setting powder after your liquid and cream complexion products, such as foundation and concealer. Use it mainly on areas where you want to reduce shine or prevent makeup from moving.
Do you put setting powder before or after foundation?
Setting powder is generally applied after foundation and concealer when you’re using it to set those products.
Can I use setting powder without foundation?
Yes. You can apply setting powder directly to moisturized skin if you simply want to reduce shine or create a more matte finish.
Should I use setting powder before or after blush?
If you’re using powder blush, setting the base first generally makes the powder blush easier to apply evenly. Cream blush is typically used before powder products.
How do I put on setting powder without making my makeup cakey?
Use a small amount, apply it only where needed, and press it gently into the skin. Avoid repeatedly layering powder over oily areas without first removing excess oil.
Is setting powder good for oily skin?
It can be useful for controlling shine and helping makeup stay in place. However, using too much can make the complexion look heavy, so build coverage gradually.
Is setting powder good for dry skin?
It can be, but use it selectively. Applying a heavy layer over dry areas may emphasize texture. Focus on places where makeup tends to crease or move.
Yes. Use a small amount after blending your concealer and smoothing out any creases. A light application is usually enough for everyday makeup.
How do I know if I’m using too much setting powder?
If your skin looks visibly powdery, feels heavy, or dry areas become more noticeable, you’ve probably applied more than you need.
Conclusion:
Learning how to use setting powder is less about applying as much product as possible and more about knowing where your makeup actually needs help.
Start with a small amount. Set the areas that crease or become shiny, rather than automatically powdering your entire face. Smooth out concealer before setting it, and use gentle pressing or sweeping motions instead of rubbing.
Once you find the amount and application method that work for your skin, setting powder becomes a quick finishing step rather than something you have to worry about. The best result is simple: makeup that stays where you put it while your skin still looks like skin.

Name: Shahzadi
I’m passionate about skincare, beauty, and simple self-care. I share practical skincare tips, beauty routines, product insights, and easy ways to build healthy-looking, glowing skin.
My goal is to make beauty and skincare easier to understand, so you can discover routines that fit your everyday life.


