

Many people believe that the best makeup foundation for photos is simply the one with the highest coverage. That’s not always true. A thick layer of foundation can actually make your skin look heavy, cakey, or unnatural when a camera captures every little detail.
What looks smooth in the mirror may appear completely different under flash, studio lights, or a high-resolution camera. The real goal is to find a foundation that looks good in photos while still looking like real skin.

Choosing a camera-ready foundation is about more than coverage. You need the right shade, finish, texture, and formula for the type of photos you’re taking.
Whether you need a best foundation for professional photoshoots, a natural base for selfies, or a best makeup foundation for photos and flash photography, your makeup should work with the camera instead of fighting it.
In this guide, we’ll look at what makes a foundation truly photo-friendly and how to create a smooth, natural-looking base that stays flattering in pictures.
What Makes the Best Makeup Foundation for Photos?
The best makeup foundation for photos isn’t necessarily the thickest, most expensive, or most full-coverage formula. A good photo-friendly foundation should blend into your skin, sit comfortably under lighting, and keep your complexion looking even without hiding your natural skin texture.
The right choice depends on your skin type, the kind of photos you’re taking, and whether you’ll be dealing with natural light, studio lights, or camera flash.
A Natural-Looking Finish
A natural finish is often a safe choice when you want your makeup to look realistic on camera. Natural-looking foundation for photos gives your skin some dimension without making it look excessively shiny or completely flat.
If your foundation is extremely matte, strong lighting may make your complexion look dry or flat. On the other hand, a very dewy formula can reflect light and make certain areas look oily.
A balanced finish can help create a foundation for a natural photo finish while still giving you enough coverage to even out your complexion.
The Right Amount of Coverage
Coverage should match what you actually need. If your skin is fairly even, a medium-coverage formula may be enough. If you want to cover noticeable redness, blemishes, or discoloration for a photoshoot, you may prefer a full coverage foundation for photos.
But here’s the trick: don’t automatically pile on more product. Applying several thin layers can often create a smoother result than one heavy layer. This helps your makeup foundation for photography look more natural when the camera gets close.
A Smooth, Skin-Like Texture
High-resolution cameras can pick up details that you may not notice in person. That’s why texture matters just as much as coverage. A good smooth foundation for photos should sit evenly over the skin instead of collecting around pores, dry patches, or fine lines.
Your skincare and application technique also play a role. Well-prepared skin gives foundation a better surface to work with, while excessive product can create a flawless foundation finish that looks less flawless once photographed.
A Formula That Lasts
Photoshoots, weddings, parties, and other events can last for hours. Your foundation needs to stay comfortable and presentable while you move, talk, sweat, and spend time under lights.
A long-lasting foundation for photoshoots can be especially useful for professional photography and special occasions. Still, long wear shouldn’t mean a heavy-looking base. Look for a formula that remains even without becoming dry, patchy, or cakey as time passes.
Minimal Flashback
Flashback is one of the biggest concerns when choosing a foundation for camera makeup. It happens when your face appears noticeably lighter or whiter in flash photographs than it does in normal lighting.

A flashback-free foundation can help reduce this problem, but your entire makeup routine matters too. Setting products, sunscreen, lighting, and the amount of powder you use can all affect how your face appears under a flash. That’s why it’s smart to test your complete makeup look before an important event.
Think About the Camera, Not Just the Mirror
The foundation that looks perfect in your bathroom mirror may not produce the same result in a photograph. Cameras capture light, texture, and color differently from the human eye.
Before committing to a foundation, take a few test photos. Check your makeup in daylight, indoor lighting, and with flash if flash photography will be used. This simple step can help you find a foundation that photographs well instead of relying only on how it looks face-to-face.
Ultimately, the best makeup foundation for photos should give you an even complexion while keeping your skin looking like skin. Focus on the right finish, suitable coverage, smooth texture, lasting power, and reliable performance under the lighting you’ll actually face.
Best Foundation for Photography: What Finish Should You Choose?
A common mistake is assuming that matte foundation is always the best foundation for photography because cameras can pick up shine. Not necessarily. A very matte base can make skin look flat, dry, or overly made-up, especially under strong lighting. The better approach is to choose a finish that suits your skin and the type of photos you’re taking. Matte, dewy, and natural finishes can all work when you use them in the right situation.
Matte Foundation for Photography
A matte foundation for photography can be a great option if your skin tends to get oily, especially around the forehead, nose, and chin. It helps reduce visible shine and can keep your complexion looking more controlled during long photoshoots.
Matte formulas are particularly useful for studio photography, events, and situations where strong lights are pointed directly at you. However, don’t go overboard. An extremely dry-looking base can make pores and flaky areas more noticeable.
If you choose a matte formula, focus on applying a thin, even layer. You can also keep powder limited to areas that actually become shiny. This creates a more polished camera-ready foundation without making your entire face look flat.
Dewy Foundation for Photos
If you prefer fresh, glowing skin, a dewy foundation for photos may be a better fit. A subtle glow can give your complexion a healthy appearance and add dimension to portraits.
The key word here is subtle. Too much shine can reflect light and make areas such as the forehead, cheeks, or nose appear greasy in photographs. That’s especially noticeable with close-up pictures and bright lighting.
For a softer result, you can use a dewy foundation and control shine selectively with a small amount of powder. This lets you keep the glow where you want it while preventing excessive reflection.
Natural-Finish Foundation
For many people, a natural finish is the easiest middle ground. It sits between an intensely matte and highly dewy look, making it suitable for different types of photography.
A natural-looking foundation for photos can work particularly well for portraits, professional headshots, family pictures, and everyday photography. It can even be a smart choice when you need a best foundation for photos that looks natural rather than obviously makeup-heavy.
The goal isn’t to erase every trace of skin. You want your complexion to look even while retaining some realistic texture. When foundation blends well and matches your skin tone, the finished result can look polished both in person and through the camera.
Full Coverage vs. Medium Coverage
Coverage is another important part of choosing the best foundation for photography. Full coverage isn’t automatically better. It depends on what you want to hide and how much makeup you normally wear.
A full coverage foundation for photos can be useful when you need to cover significant redness, blemishes, pigmentation, or uneven skin tone. It’s also commonly considered for bridal makeup and professional photoshoots where a more perfected complexion is desired.
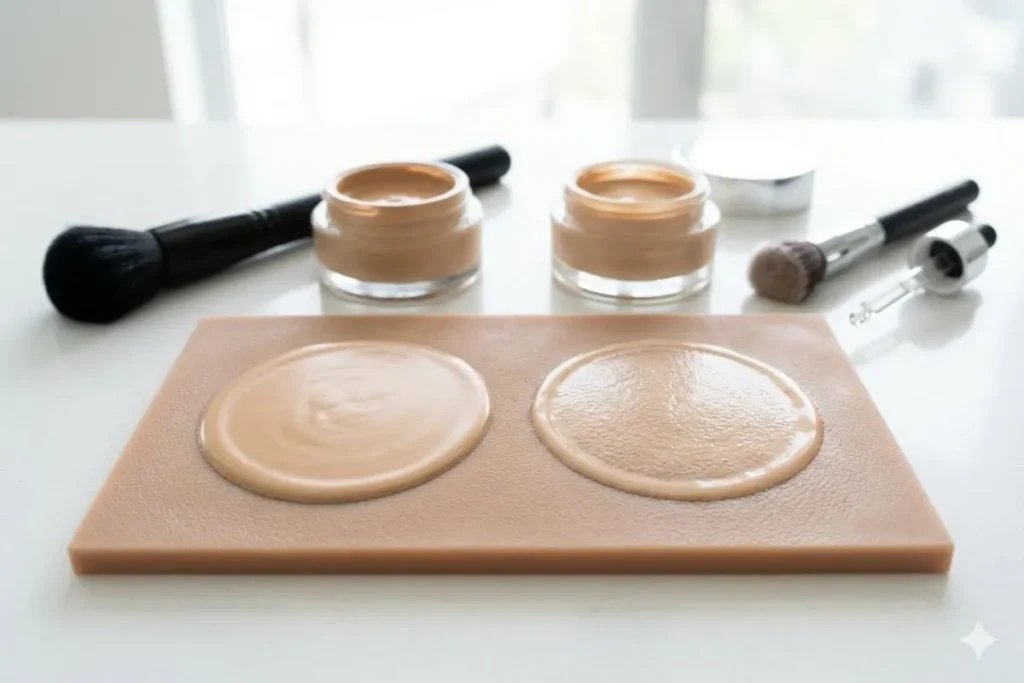
Medium coverage, however, can give you a lighter and more natural result. It’s often enough to even out the complexion while allowing some of your natural skin to show through.
If you need more coverage in certain areas, try building it gradually instead of applying a heavy layer across your entire face. This technique can give you the benefits of fuller coverage while keeping the overall foundation for a natural photo finish.
Best Makeup Foundation for Photos and Flash Photography
A common belief is that any foundation will look fine as long as your makeup looks good in the mirror. Unfortunately, flash photography can tell a different story.
A foundation may look perfectly matched in normal lighting but appear lighter, uneven, or noticeably different when a camera flash hits your face.
That’s why choosing the best makeup foundation for photos and flash photography requires a little more testing than choosing an everyday base.
Why Flash Changes the Appearance of Foundation
Camera flash creates a short burst of strong, direct light. That light can bounce off the surface of your makeup and change how your complexion appears in the final image.
This is especially important for evening events, weddings, parties, and indoor photography where photographers frequently use flash. A foundation for camera flash should look balanced under direct light instead of creating obvious differences between your face and neck.
Your foundation shade also matters. If the formula is too light or doesn’t match your natural skin tone, flash can make the difference more noticeable. The same can happen when you apply a heavy layer of brightening products underneath your foundation.
What Is Foundation Flashback?
Foundation flashback is the unwanted effect where certain areas of the face appear noticeably lighter or whitish when photographed with flash. It can make your makeup look completely different from how it appeared in person.
People often search for a foundation without flashback or a flashback-free foundation for this reason. But remember, flashback isn’t always caused by foundation alone. Other products in your makeup routine can contribute to the effect.
For example, some setting powders and complexion products can reflect intense light. Using several products with similar light-reflecting properties may make the problem more noticeable.
If you’re specifically looking for the best foundation for photography without flashback, don’t judge the product only by its appearance in daylight. Test the complete makeup routine under the type of flash you’ll actually encounter.
How to Test Foundation for Flash Photography
A simple camera test can save you from an unpleasant surprise on photo day.
Start by applying your foundation the way you normally would. Make sure you use the same primer, concealer, powder, and other complexion products you plan to wear for the event.
Take one picture in normal indoor lighting, then take another in natural daylight. After that, use direct flash for a third photo. Take a close-up as well so you can inspect your skin and makeup more carefully. Check whether your face and neck still appear to match in each photo.

Don’t rely only on how the foundation looks on your phone screen. If possible, view the photos on a larger screen. Look for unusual whiteness, excessive shine, visible texture, or areas where the foundation looks much heavier than it did in person.
This quick test is especially useful when choosing the best makeup foundation for photos and flash photography for a wedding, professional photoshoot, or major event.
Common Flash Photography Mistakes
Even a good photo-friendly foundation can look disappointing if the rest of your makeup isn’t prepared for flash. Here are some common mistakes to avoid.
Using too much powder:
Excess powder can make the complexion look dry and pale under strong light. Set only the areas that actually need it.
Choosing a foundation that’s too light:
Your foundation should match your skin rather than intentionally making your face several shades lighter. Flash can make a shade mismatch more obvious.
Ignoring your neck:
A face that looks fine on its own can still look disconnected from the neck in photographs. Blend your foundation carefully around the jawline.
Skipping the flash test:
This is one of the easiest mistakes to prevent. If flash photography is part of your event, test your entire makeup routine beforehand.
Applying too much product:
More makeup doesn’t always produce a better photograph. Heavy layers can become obvious when a camera captures your skin up close.
The Smart Way to Prepare for Flash Photography
If you know you’ll be photographed with flash, think beyond the foundation itself. Your primer, foundation, concealer, powder, and setting products all work together.
Keep the base even and well blended. Match the foundation to your actual skin tone. Control shine without covering your entire face in powder. Most importantly, test the finished look under similar lighting before the event.
That extra five minutes can make a big difference. Instead of hoping your foundation that photographs well will perform under flash, you’ll already know how your complete makeup look behaves when the camera starts clicking.
Frequently Asked Questions About the Best Makeup Foundation for Photos
What Is the Best Makeup Foundation for Photos?
The best makeup foundation for photos depends on your skin type, the lighting, and the kind of pictures you’re taking. In general, look for a foundation that matches your skin tone closely, blends evenly, and gives you a balanced finish. A natural or soft matte formula can be a practical choice because it helps create an even complexion without looking overly shiny or heavy.
What Foundation Looks Best in Photos?
A foundation with a smooth, natural-looking finish often works well for photographs. The goal is to even out your complexion while keeping your skin looking realistic. Avoid applying too much product, as heavy layers can become more noticeable in close-up photos. Testing the foundation with your actual camera and lighting is also a smart way to see how it really photographs.
What Foundation Is Best for Flash Photography?
For flash photography, choose a formula that photographs evenly and test it before your event. A flashback-free foundation can help, but don’t forget that other complexion products can affect flash photography too. Setting powder, brightening products, and even the amount of product applied can change how your face appears under direct flash.
Is Matte or Dewy Foundation Better for Photos?
Neither finish is automatically better for every person. A matte foundation for photography can work well for oily skin because it helps control visible shine. A dewy foundation for photos can give dry or normal skin a fresh appearance.
If you want something in between, a natural finish can offer a balanced look without excessive shine or dryness.
Is Full Coverage Foundation Better for Photography?
Not necessarily. Full coverage foundation for photos can be useful when you want to cover noticeable redness, blemishes, or uneven pigmentation. However, medium coverage may look more natural when your skin doesn’t need extensive correction.
You can also build coverage only where needed instead of applying a thick layer everywhere.
How Do I Stop My Foundation From Looking White in Photos?
First, make sure your foundation matches your skin tone. Then test your complete makeup routine with flash before the event. Excessive powder or certain light-reflecting complexion products can also contribute to a pale appearance.
If you’re searching for a foundation without flashback, remember to test the entire makeup combination rather than judging the foundation by itself.
Why Does My Foundation Look Cakey in Pictures?
Foundation can look cakey when you use too much product, apply several heavy layers, or skip proper skin preparation. Dry patches can also become more visible in photographs. Try using a smaller amount, blend it well, and build coverage gradually.
A smooth foundation for photos should enhance your complexion rather than create a thick-looking layer.
How Do I Make My Foundation Look Natural in Photos?
Start with well-prepared skin and apply a thin layer of foundation. Blend carefully around the nose, hairline, jaw, and other areas where product can collect. Add extra coverage only where necessary.
Before your photoshoot, check your makeup in natural light and take a few test pictures. This is one of the easiest ways to create a foundation for a natural photo finish.
What Foundation Is Best for Wedding Photography?
For wedding photography, look for a foundation that provides comfortable long wear, matches your skin tone, and performs well under both natural and artificial lighting.
A long-lasting foundation for photoshoots can be useful because wedding days often involve many hours of photographs. Flash testing is also important if the photographer will use flash.
How Do I Choose Foundation for HD Photography?
HD cameras can capture fine details, so avoid applying unnecessarily thick layers. Look for a lightweight formula that blends smoothly and gives you the coverage you actually need. Test it with a high-resolution camera before the shoot.
The best foundation for HD camera photography should give an even complexion without making skin texture look exaggerated.
Should I Test My Foundation Before a Photoshoot?
Yes. A quick test can reveal problems that aren’t obvious in the mirror. Take photos in the lighting you’ll experience and check the foundation from different angles. Look for shade differences, excessive shine, cakiness, and flashback.
This simple step can help you find a foundation that photographs well before the important day.
Does Expensive Foundation Always Look Better in Photos?
No. Price alone doesn’t determine how a foundation will photograph. Shade matching, application, skin preparation, lighting, and product compatibility can all have a bigger impact on the final image.
The right camera-friendly foundation is one that works with your skin and the photography conditions you’re dealing with.
Conclusion:
Finding the best makeup foundation for photos isn’t about choosing the heaviest coverage or the most expensive formula. It’s about finding a base that works with your skin, your makeup routine, and the lighting you’ll actually be photographed in.
Start with the right shade and choose a finish that suits your skin. If you have oily skin, a soft matte formula can help keep shine under control. If your skin is dry, a natural or slightly dewy finish may look more comfortable. For combination skin, you can balance the finish by controlling shine only where needed.
Think about coverage too. A full coverage foundation for photos can be useful for special events or noticeable imperfections, while medium coverage may give you a more natural result for portraits and everyday pictures. Whatever coverage you choose, apply it in thin layers and build only where necessary.
Don’t forget about the camera itself. A foundation that looks beautiful in the mirror may react differently to flash, studio lighting, or an HD camera. Always test your complete makeup look before an important photoshoot. Take a few pictures in different lighting and check for flashback, excessive shine, cakiness, or a shade mismatch.
The best foundation that photographs well is ultimately the one that makes your skin look even, fresh, and believable on camera. Get the shade right, keep the application light, test your makeup beforehand, and you’ll be much closer to a polished, photo-ready makeup foundation that looks great both in person and in pictures.

Name: Shahzadi
I’m passionate about skincare, beauty, and simple self-care. I share practical skincare tips, beauty routines, product insights, and easy ways to build healthy-looking, glowing skin.
My goal is to make beauty and skincare easier to understand, so you can discover routines that fit your everyday life.


